
Cherry Hill Roofing handles roof repair in Cherry Hill, NJ and has done so for more than 20 years, serving surrounding cities including Haddonfield, Haddon, Collingswood, Bellmawr and Gloucester City. We fix the roof you have when it can be fixed, from a single cracked pipe boot to a rusted run of chimney flashing or a slate roof missing a dozen pieces.
The repair is only as good as the diagnosis behind it. Water often travels along rafters and the deck before it shows on a ceiling, so every repair call includes a look from the attic as well as from the roof. That way the fix goes where the water actually gets in, not where the stain happens to appear.
We also give you a plain answer before quoting anything. If a repair will give the roof years of good service, that is what we recommend. If the covering is worn out, we say so, show you the photos, and let you decide without pressure.
Residential Roof Repair
Asphalt Shingle Repairs
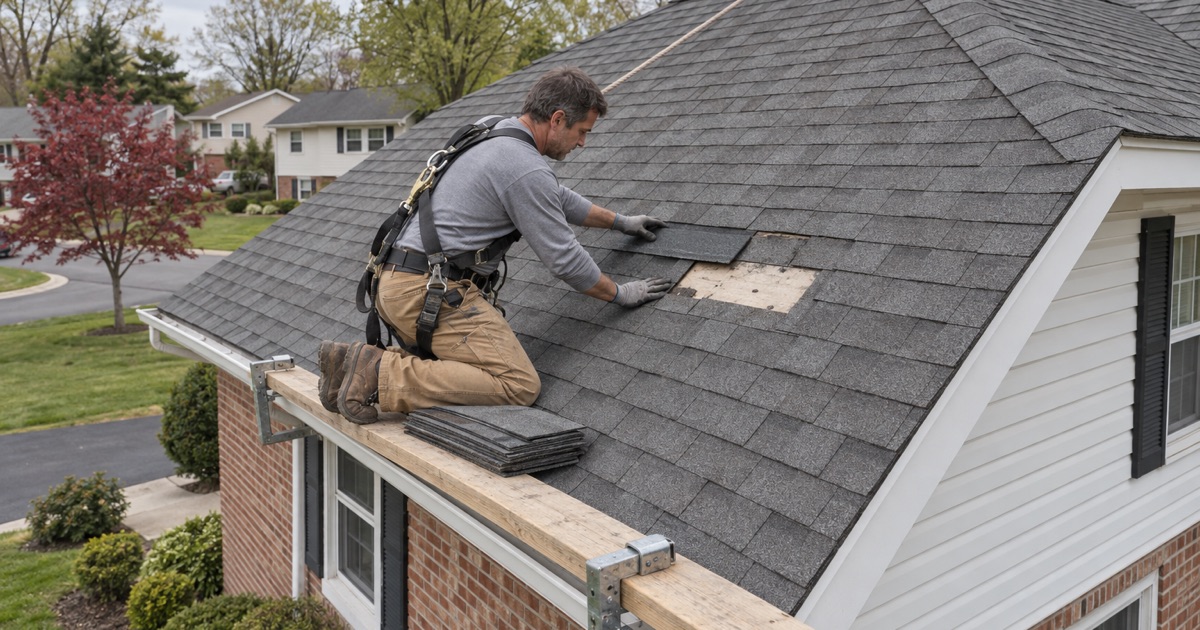
Asphalt shingles fail in patches long before the whole roof is finished. Wind breaks the seal strips and creases tabs, a fallen branch can puncture a few courses, and exposed nail heads rust and let water follow the shank down into the deck. Each of those is a targeted repair rather than a reason to reroof.
We lift the surrounding shingles carefully, replace the damaged pieces with the closest available match, and fasten them according to the manufacturer’s nailing pattern. Tabs around the repair are hand-sealed so the next storm does not lift them again.
Flashing and Penetration Repairs
Most roof leaks start at something that passes through the roof or meets it: vent pipes, chimneys, skylights, exhaust fans and the walls where an addition joins the main house. The metal and rubber pieces that seal those joints usually wear out well before the shingles around them.
We replace cracked pipe boots, rusted step flashing and loose counter flashing instead of covering them with roofing cement. Caulk can stop a drip for a season, but it cracks with the first hard freeze, while new flashing installed in the right order sheds water for the life of the roof.
Slate and Older Roof Repairs
Older houses in the area often carry natural slate or roofs with original details that a modern crew may not recognize. Slate rarely wears out as a material. What fails is the nails that hold it, the flashing around it, or individual pieces cracked by foot traffic or falling limbs.
We repair those roofs with matching material where it can be sourced, using slate hooks or copper nails, rather than patching a slate roof with asphalt shingles or tar. A properly repaired slate roof keeps both its weatherproofing and its appearance.
Commercial Roof Repair
Flat and Low-Slope Membrane Repairs
Small commercial buildings, offices, and mixed-use storefronts usually sit under flat or low-slope roofs covered with EPDM rubber, TPO, PVC or modified bitumen. On those roofs, leaks come from split seams, punctures from foot traffic, failed flashing at parapet walls and clogged drains that let water pond.
We clean and prepare the membrane, then patch with compatible material, rebuild failed flashing at curbs and walls, and clear the drains. Mixing incompatible materials is a common shortcut that fails quickly, so we match each repair to the membrane already on the roof.
Metal Roof and Rooftop Equipment Repairs
Metal roof panels leak at fasteners whose rubber washers have dried out, at seams that have separated, and around the curbs of rooftop units. Rooftop equipment adds its own risks, since every service visit means people walking across the roof.
We replace failed fasteners, reseal or rebuild panel laps, and reflash equipment curbs. Where foot traffic keeps damaging the same spot, we discuss adding walkway pads to protect the roof surface.
Roof Problems We Repair Most Often
Leaks Where Roofs Meet Walls
Where a sloped roof runs into a sidewall, every course of shingles needs its own piece of step flashing, and the bottom needs a kick-out to throw water into the gutter. Missing kick-outs are one of the most common causes of rotted sheathing and stained siding we find.
The repair means removing the shingles along the wall, installing new step flashing woven into each course, adding a kick-out at the bottom edge, and tucking counter flashing or the siding back over the top. If the sheathing behind has softened, we replace it while the wall is open rather than closing rot back in.
Ice Damming and Eave Damage
After a snowy winter, eaves can show lifted shingles and stained soffits where meltwater backed up under the roof. We repair the damaged edge with a self-adhering ice and water barrier meeting ASTM D1970 and look in the attic for the ventilation or insulation problem that caused it.
A repair at the eave alone treats the symptom. Warm air leaking into the attic from recessed lights, bath fans or an open attic hatch melts the snow above, so we point out those air leaks and check whether the soffit vents are blocked by insulation. Fixing both keeps the same ice dam from forming next winter.
Storm Damage From Wind and Falling Limbs
Storm damage is usually sudden and visible: missing shingles, torn ridge caps or a puncture from a limb. We tarp the opening if needed, photograph everything for your own insurance claim, and repair the damage once the claim is underway or you decide to proceed.
We write up what we find, with photos of each damaged area and the direction the damage runs, so the record is ready if you file a claim. If you ask, our crew will meet the insurance adjuster on site and point out the damage. The claim itself stays yours, since negotiating it for pay is work only a licensed public adjuster may do.
Our Step-by-Step Roof Repair Process
Step 1: Inspect From the Attic and the Roof
We start where the water shows and follow it back. In the attic, we look for wet sheathing, staining on rafters and daylight around penetrations. On the roof, we check the shingles, flashing and fasteners directly above.
If the source is not obvious, we look at the things that imitate roof leaks: a bathroom fan venting into the attic, condensation on uninsulated ductwork, or a plumbing vent with a cracked joint. Ruling those out first keeps you from paying for roof work that would not have stopped the drip.
Step 2: Explain What We Found
You get photos of the problem and a plain explanation of what failed and why. We also tell you honestly whether repair makes sense for the roof’s age and condition, or whether you would be repairing a roof that is near the end of its life.
Step 3: Repair With Matching Materials
We make the repair with materials suited to the roof, installed in the right order so water sheds over each layer. Flashing is replaced, not caulked over, and shingle or slate repairs match the existing roof as closely as possible.
If we lift shingles and find soft decking under the repair area, we stop and show you before replacing it. Small sections of rotted sheathing are common around old leaks, and replacing them now prevents the new shingles from being nailed into wood that will not hold a fastener.
Step 4: Clean Up and Check the Work
Before we leave, the area is cleaned, the gutters are cleared of debris, and the yard below is swept with a magnet for nails. If the leak showed inside, we check again after the next heavy rain to confirm the repair held.
- 20+ Years on Local Roofs
- Repair-First Advice
- Itemized Written Scopes