
Cherry Hill Roofing provides roof leak repair in Cherry Hill, NJ, serving surrounding cities including Haddonfield, Haddon, Collingswood, Bellmawr and Gloucester City. In more than 20 years of chasing leaks through the attics of local houses, we have learned that the stain on the ceiling is rarely directly under the hole in the roof.
Water gets in at one point, runs along the underside of the deck or down a rafter, and drops onto the ceiling wherever gravity takes it. A roofer who patches the shingles above the stain often misses the real entry point entirely, and the leak comes back with the next storm.
So every leak call starts in the attic as well as on the roof. We follow the water back to where it actually gets in, show you what we found, and repair that source. Only then do we price anything, because the right repair depends on the cause.
Where Roof Leaks Start on a House
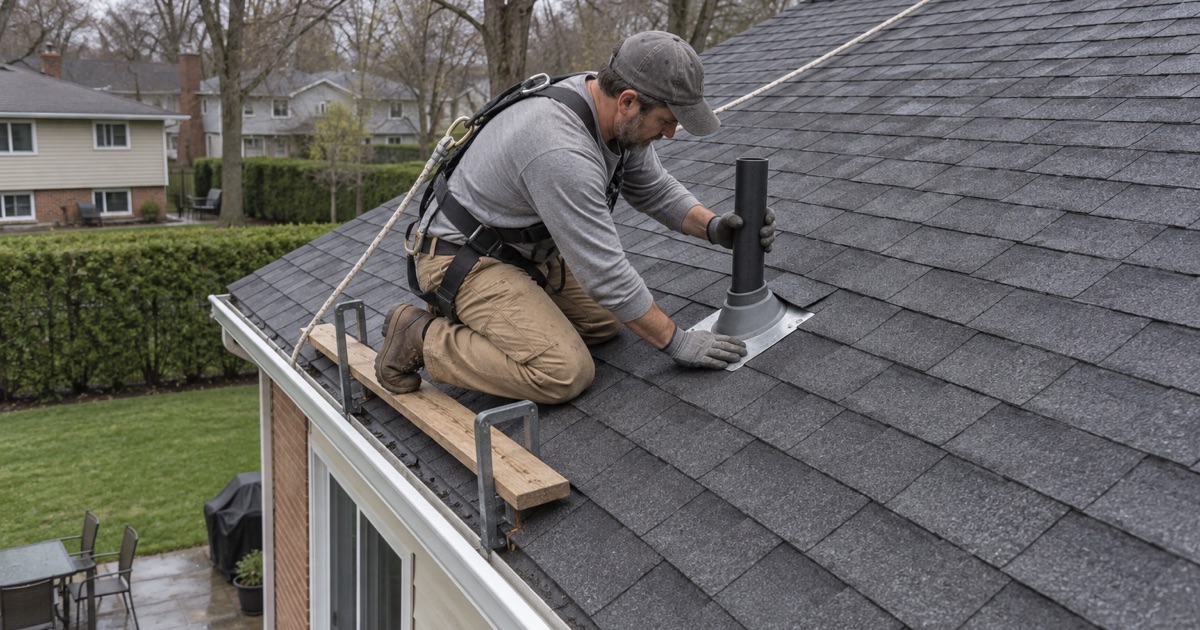
Pipe Boots and Roof Vents
The rubber collar around a plumbing vent pipe is one of the most common leak sources we find. Sun and heat crack the rubber over time, and once it splits, rain runs straight down the outside of the pipe and into the attic.
The fix is a new pipe boot, properly lapped under the shingles above and over the shingles below. Box vents and exhaust fan hoods get the same check, since their flashing and fasteners loosen with age.
Chimney Leaks
Chimneys leak where the roof meets the brick. Step flashing along the sides, counter flashing set into the mortar, and the apron at the front all have to work together, and on many older houses one of them has rusted or pulled loose.
We replace the failed flashing and cut new counter flashing into a reglet rather than gluing it to the face of the brick. On a wide chimney, a cricket on the uphill side diverts water around it instead of letting it pool against the masonry.
Skylight Leaks
Skylights leak at the flashing around the curb or, on older units, through failed seals in the glazing. Condensation dripping from the inside of the glass can also look like a leak, so we check which one it is.
If the unit is sound, we reflash it properly. If the seals have failed, or the skylight is old enough that the roof will outlast it, we discuss replacing the unit while the roof is open.
Valleys and Roof-to-Wall Joints
Valleys collect water from two roof planes, and any gap in the valley lining sends it straight in. Walls where an addition or dormer meets the roof need step flashing at every course and a kick-out at the bottom.
When those details are missing or rusted, water soaks the sheathing and often rots the wall framing behind the siding. We rebuild the valley or the wall flashing and replace any soft wood we uncover.
Ice Dam Leaks at the Eaves
In winter, heat escaping into the attic melts snow on the upper roof, and the water refreezes at the cold eave. The ice ridge holds back meltwater, which backs up under the shingles and leaks into the soffit or the exterior walls.
We repair the damaged edge with a self-adhering ice and water barrier meeting ASTM D1970 and point out the ventilation and air leaks causing the problem. Fixing the cause keeps the leak from returning every winter.
Exposed Nails and Wind-Lifted Shingles
A nail driven too high, or one left exposed when a ridge cap was set, rusts and lets water follow the shank straight through the deck. These leaks are small and slow, and they often show up as a single brown spot on a ceiling or a drip at one rafter.
Wind creates a similar problem when it breaks the seal strip under a row of shingles. The lifted tab lets rain blow underneath, especially on the side of the roof facing the storm. We replace damaged shingles, seal down lifted tabs and drive or cover any exposed fasteners.
Leaks That Are Not the Roof
Condensation and Exhaust Fans
Not every wet ceiling is a roof leak. Bathroom and kitchen fans that vent into the attic instead of outside fill it with warm, moist air, which condenses on the cold underside of the deck and drips onto the insulation.
The signs are frost on nail tips in winter, dark staining spread evenly across the sheathing, and drips that appear on cold, dry days. The fix is venting the fans outdoors and balancing the attic ventilation, not roof work.
Plumbing, Ductwork and Air Conditioning
Attic ductwork and air conditioning lines can sweat in summer, and a clogged condensate line can overflow onto a ceiling. A leaking supply line or drain in a wall can also look like a roof leak from below.
Because we inspect the attic, we can usually tell you when the water is not coming from the roof. That saves you from paying for roof work that would not have stopped the drip.
Commercial Roof Leak Repair
Membrane Seams and Drains
On flat commercial roofs, leaks come from split seams, punctures, blisters and water ponding around clogged drains. Water can travel a long way under a membrane before showing inside, which makes tracing more involved.
We inspect the seams and drains, test suspect areas, and repair with materials compatible with the existing EPDM, TPO, PVC or modified bitumen membrane. Clearing the drains is part of every visit, since a single clogged outlet can hold enough water to find any weak seam nearby.
Rooftop Units and Parapet Walls
Rooftop units, curbs and parapet walls are frequent leak sources because the flashing there is exposed to foot traffic and movement. Coping caps on parapets can also let water into the wall below.
We reflash curbs and parapets, reseal or replace coping, and recommend walkway pads where service traffic keeps damaging the membrane. Those pads cost little compared with chasing the same puncture after every equipment service call.
Our Step-by-Step Roof Leak Repair Process
Step 1: Stop the Water
If water is coming in, the first job is keeping more out. We install a temporary cover or tarp over the suspected area and advise you on protecting ceilings and belongings inside.
Every step of the emergency work is photographed, along with the damage that caused it. Those photos and the receipt for the temporary repair belong in your own insurance file if the leak was caused by a storm or a falling limb.
Step 2: Trace the Leak From the Attic
In the attic, we follow the stains and wet wood back toward the high point where water first enters. We match that spot to what we find on the roof above, so the repair goes to the actual source.
When a leak is intermittent, we look for subtle signs: old water trails on rafters, rusted nails and darkened sheathing. These show where water has been entering even if the roof is dry on the day of the visit.
Step 3: Repair at the Source
We replace the failed component, whether a pipe boot, a section of flashing, damaged shingles or a membrane seam, using materials matched to the roof. Any soft decking found under the repair is shown to you before it is replaced.
If the roof is near the end of its life and the leak is one of several, we say so plainly. A repair can still make sense to keep the house dry while you plan, but you should know whether you are buying years of service or a few months.
Step 4: Confirm the Repair
After the next heavy rain, we check the attic area under the repair. Dry wood and insulation there confirm the leak has stopped, and you can then repair the ceiling knowing the water will not return.
- 20+ Years on Local Roofs
- Repair-First Advice
- Itemized Written Scopes